Peripheral devices are meant to make your setup more productive, but when they stop working, they tend to do it at the worst possible moment. A printer suddenly goes offline, a headset connects with no sound, or an external monitor refuses to turn on even though it worked perfectly yesterday.
In real-world IT troubleshooting, most of these issues are not caused by hardware failure. They usually come down to predictable categories like temporary system glitches, outdated or broken drivers, and connection or configuration issues that Windows does not always clearly explain.
To make this guide easier to follow, each section is structured in a consistent way. We start with the most common and simplest fixes, then move into connection and settings-related checks, and finally cover more technical or advanced troubleshooting steps only when necessary.
Before jumping into specific devices, always start with two quick checks. Restart both your PC and the device to reset temporary states, and think about what changed recently — such as updates, new hardware, or cable changes, which are often the real cause.
In this guide, I’ll walk through the most common peripheral issues in Windows 11 and show you a structured way to identify and fix them step by step.
1. Printer Issues (Wi-Fi & Wired)
Printers are one of the most common problem areas in Windows 11 because they rely on multiple components working together — the device itself, Windows services, drivers, and often your network. Today, most users rely on Wi-Fi printers, which adds another layer of complexity compared to traditional wired connections.
Because of that, this section focuses mainly on wireless printer troubleshooting, while also covering key checks for wired (USB) printers. In both cases, the goal is the same: start with the simplest fixes and only move to more advanced steps if needed.
1.1. Start with Basic Printer Checks
Before going deeper, handle the most common causes first. These steps resolve a large number of printer problems right away:
- Make sure the printer is powered on and not showing any error messages
- Confirm your PC and printer are connected (USB cable or Wi-Fi)
- Restart both your PC and the printer
1.2. Check connection (Wi-Fi vs Wired)
At this point, the troubleshooting path depends on how your printer is connected.
For Wi-Fi printers, the most common issue is that the printer is no longer on the same network as your PC. This can happen after router restarts or network changes.
- Make sure your PC and printer are connected to the same Wi-Fi network
- Restart your router and the printer
- Reconnect the printer to Wi-Fi using its display or companion app
For wired (USB) printers, the issue is usually physical:
- Check that the USB cable is fully connected
- Try a different USB port
- Test with another cable, if available
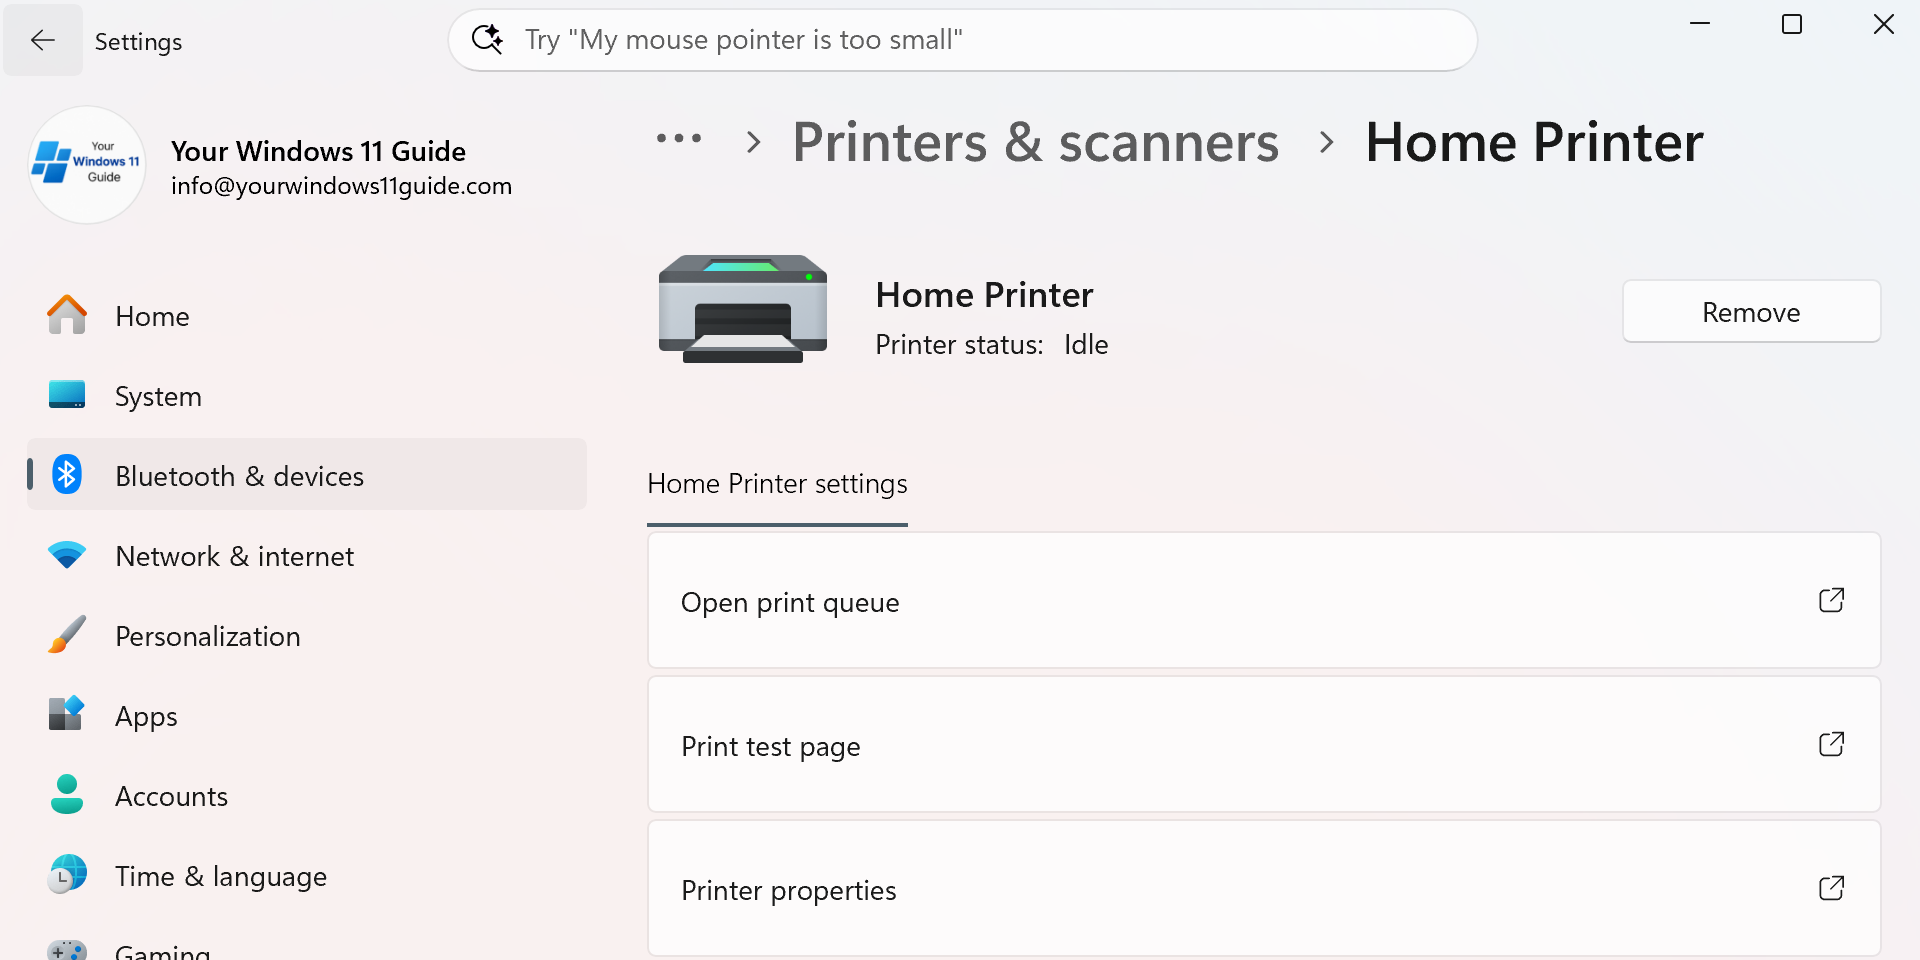
Check Windows printer settings
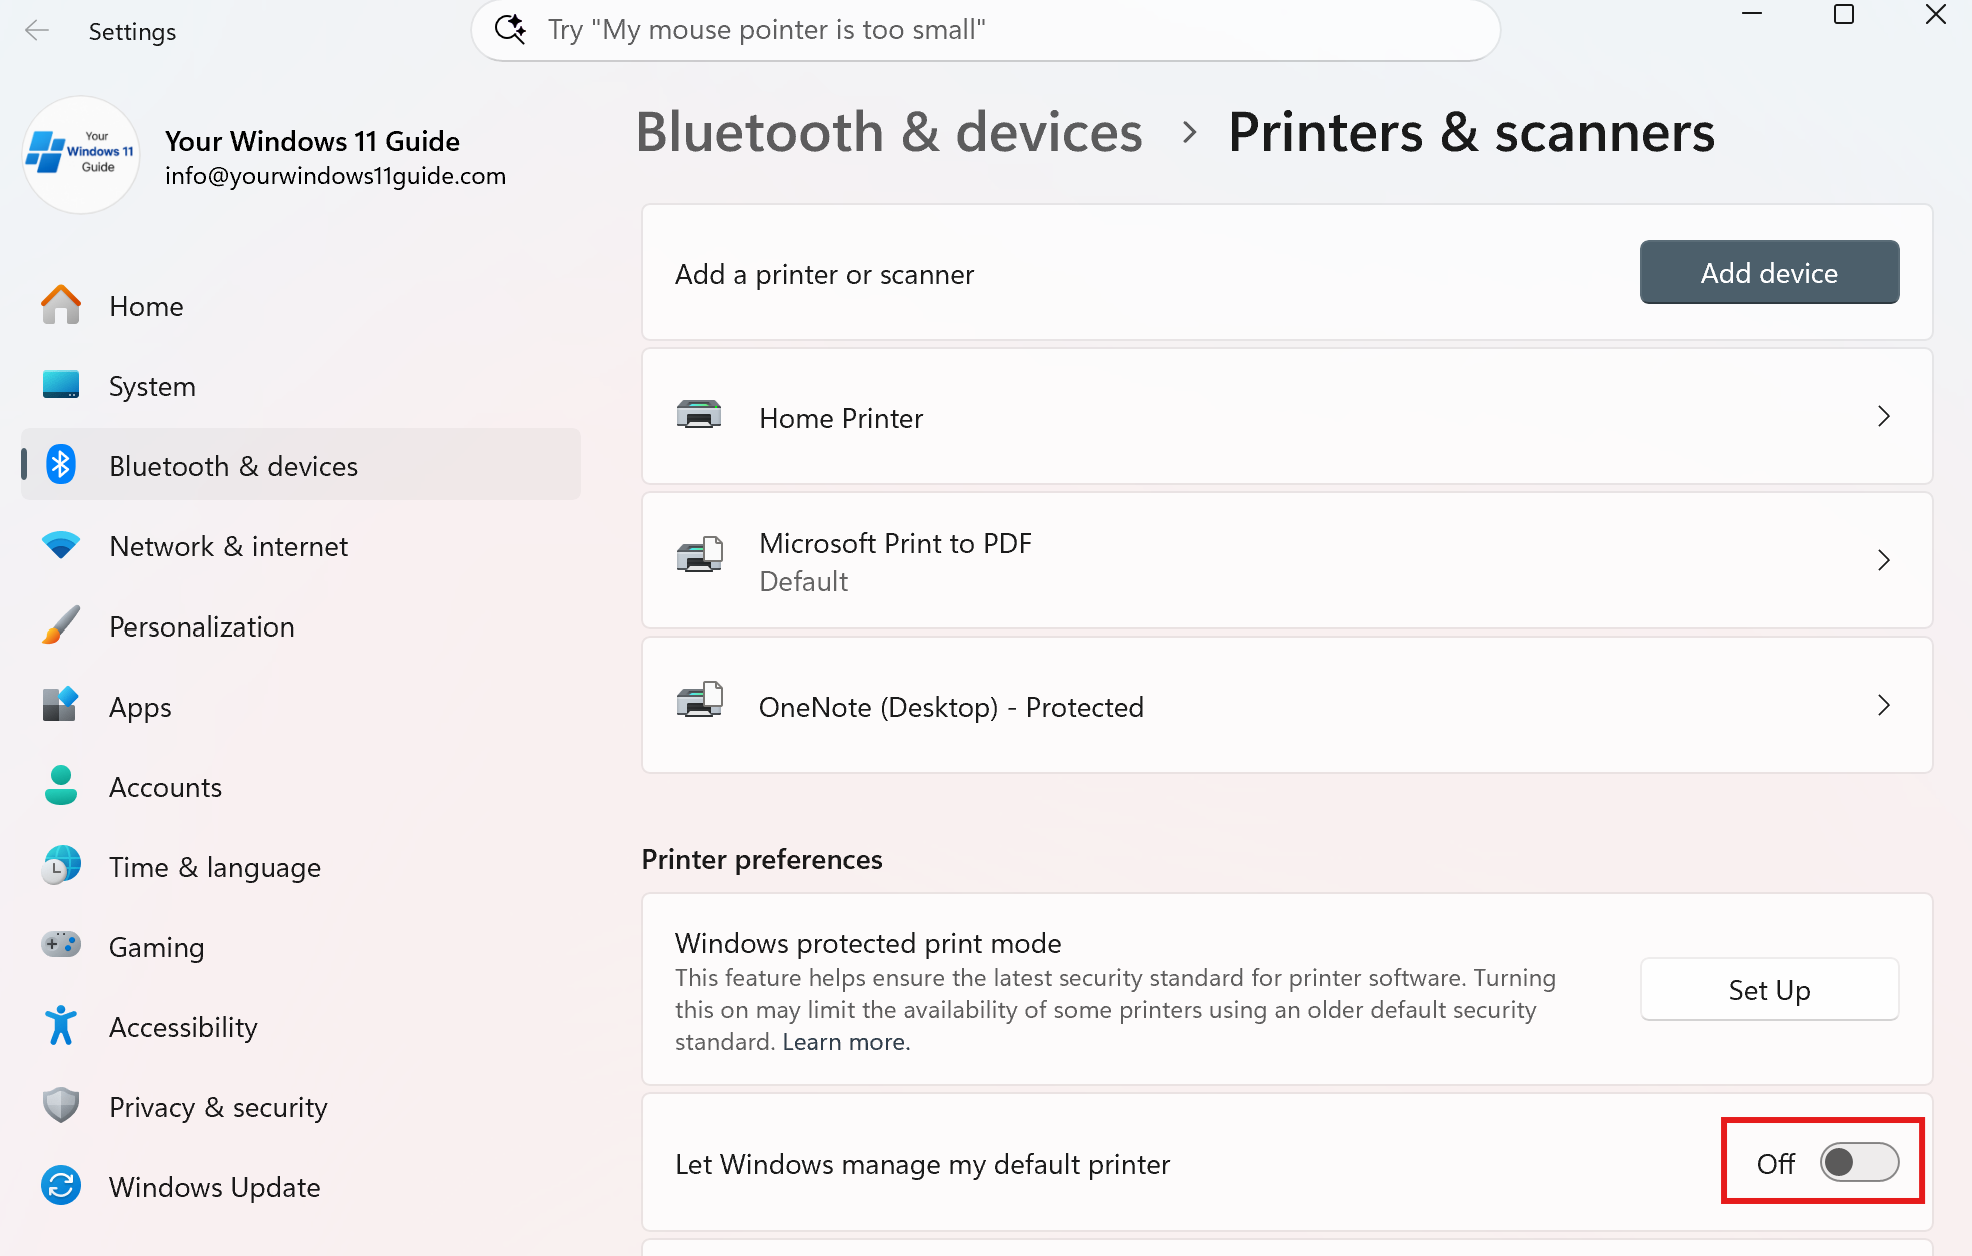
If the connection looks fine but printing still doesn’t work, Windows may not be using the correct printer or it may be stuck in an offline state. A very common issue is Windows automatically switching the default printer, which can send print jobs to the wrong device even though your printer is online.
Start with these steps:
- Go to Settings > Bluetooth & devices > Printers & scanners
- Scroll down and turn off Let Windows manage my default printer
- Select your printer
- Click Set as default
- Make sure it does not show as “Offline”
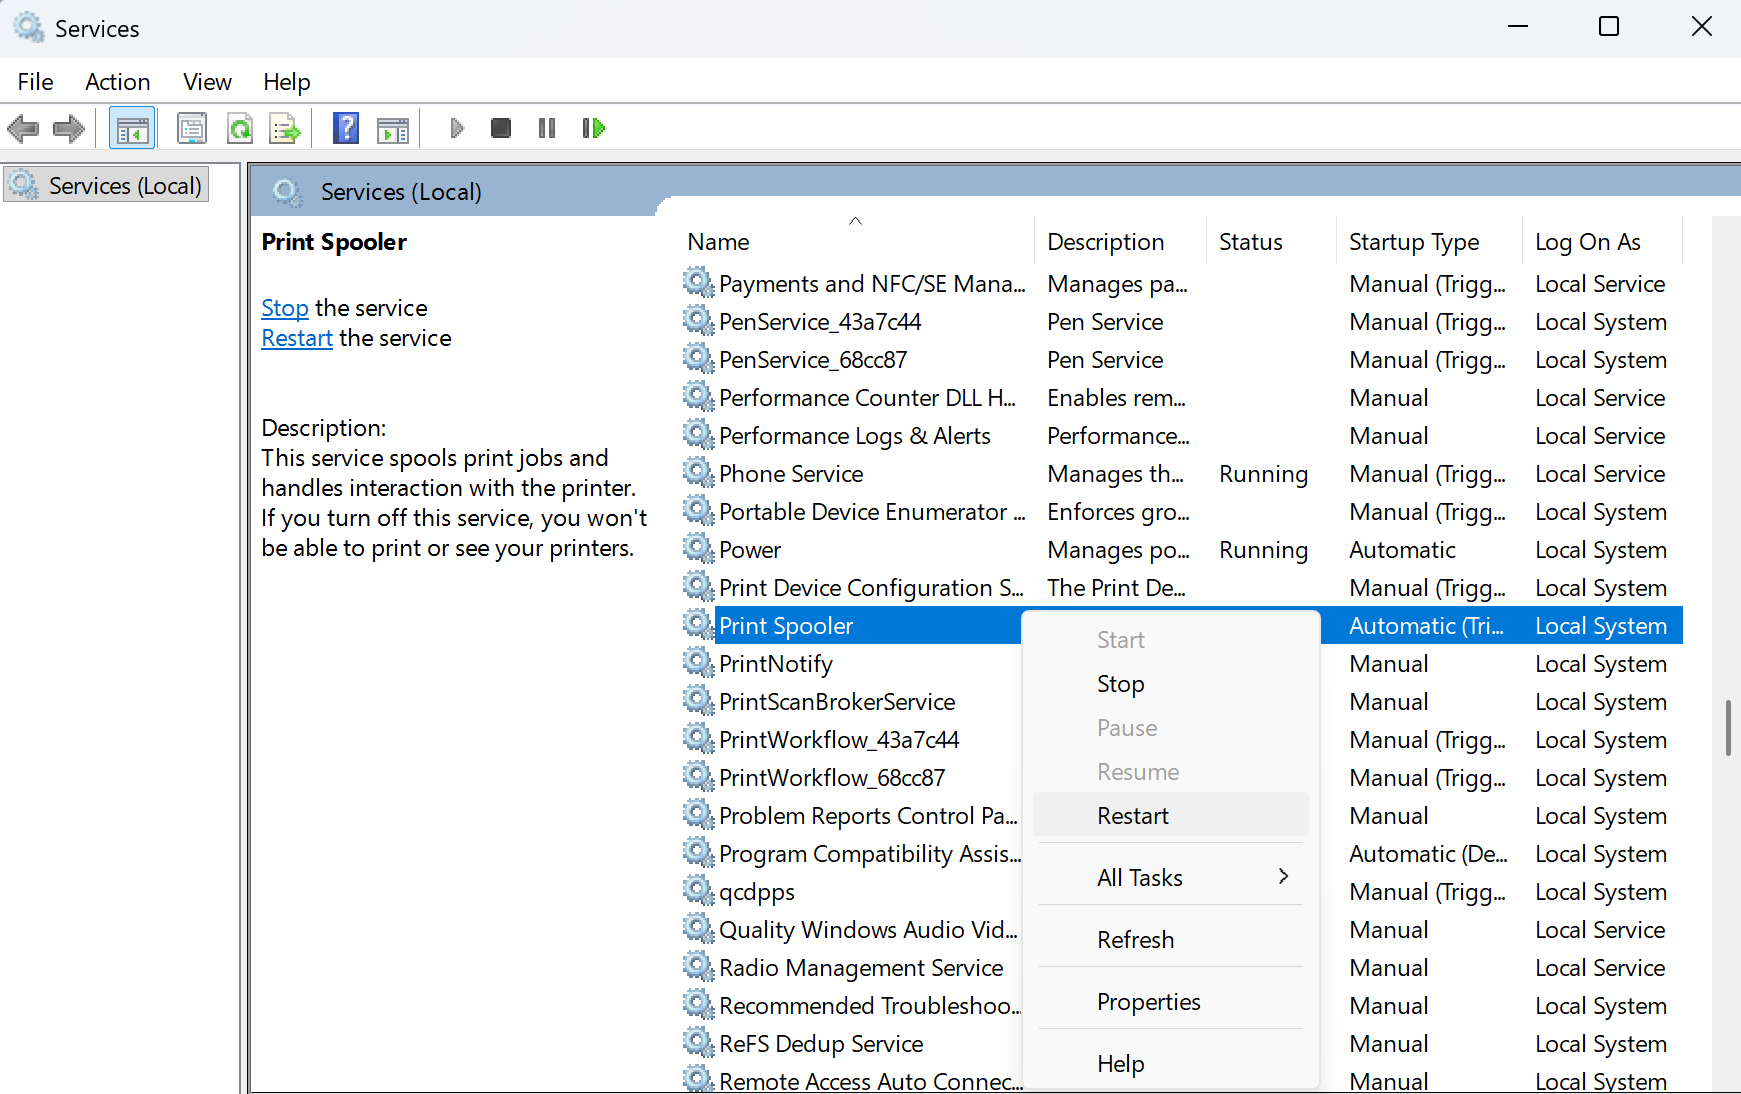
Restart Print Spooler Service
If nothing prints even though everything looks correct, the issue is often the Print Spooler service. This service manages all print jobs, and if it gets stuck, printing will stop completely.
- Press WIN + R, type services.mcs
- Find Print Spooler
- Right-click it and select Restart
Update or Reinstall Printer Drivers
Driver issues are another common cause, especially after Windows updates or when switching between devices.
- Open Device Manager
- Expand Printers
- Right-click your printer and select Update driver
If updating doesn’t help:
- Go to Settings > Printers & scanners
- Remove the printer
- Add it again to rebuild the connection
Advanced Fixes (IP Address, Firewall, Firmware Updates)
If the printer still disconnects or isn’t detected, the issue is usually network-related or configuration-based.
- Assign a static IP address to the printer (prevents it from disappearing on the network)
- Check firewall or antivirus settings temporarily
- Update printer firmware from the manufacturer’s website
- Use the printer’s official setup tool or app
Important detail
If your printer works via USB but not over Wi-Fi, the issue is almost always related to the network rather than the printer itself. Focusing on network stability usually leads to a faster solution than reinstalling drivers multiple times.
2. Scanner Not Working or Not Detected
Scanner issues in Windows 11 are usually simpler than printer problems, but they can still be confusing because many scanners depend not just on drivers, but also on the manufacturer’s software. When something stops working, the scanner may appear connected but won’t respond when you try to scan.
In most cases, the issue comes down to a temporary connection glitch, missing software, or Windows using the wrong device. The best approach is to start simple and only move to deeper fixes if needed.
Basic Scanner Connection Checks
Before checking settings or reinstalling anything, make sure the scanner itself is working and properly connected.
- Confirm the scanner is powered on and connected (USB or network)
- Restart both the scanner and your PC
- If using USB, try a different port
Fix Scanner Software & App Detection Issues
If the scanner is connected but not responding, the issue is often related to software rather than hardware. Many scanners require their own apps to function correctly, even if Windows detects them.
- Make sure the scanner appears in Settings > Printers & Scanners
- Open your scanning app and confirm the correct scanner is selected
- Install or reinstall the manufacturer’s software if required
Update or Reinstall Scanner Drivers
Outdated or broken drivers can prevent the scanner from working properly, especially after Windows updates.
- Open Device Manager
- Expand Imaging devices
- Right-click your scanner and select Update driver
If the scanner is missing entirely, reinstalling the driver from the manufacturer’s website is often the fastest fix.
Good to know
If your scanner works in one app but not another, the issue is usually with the app itself rather than the scanner. Switching apps or resetting the default scanner can often resolve this quickly.
3. Headset or Audio Device Not Working (Wired & Bluetooth)
Audio issues in Windows 11 are very common, especially when switching between devices like headsets, external monitors, or Bluetooth accessories. In many cases, sound is actually working — it’s just being sent to the wrong device, which makes it seem like audio has stopped completely.
Most modern headsets are either Bluetooth (wireless) or wired (3.5mm jack or USB), and each type can fail in slightly different ways. The key is to start with simple checks and then move toward connection or driver-related fixes.
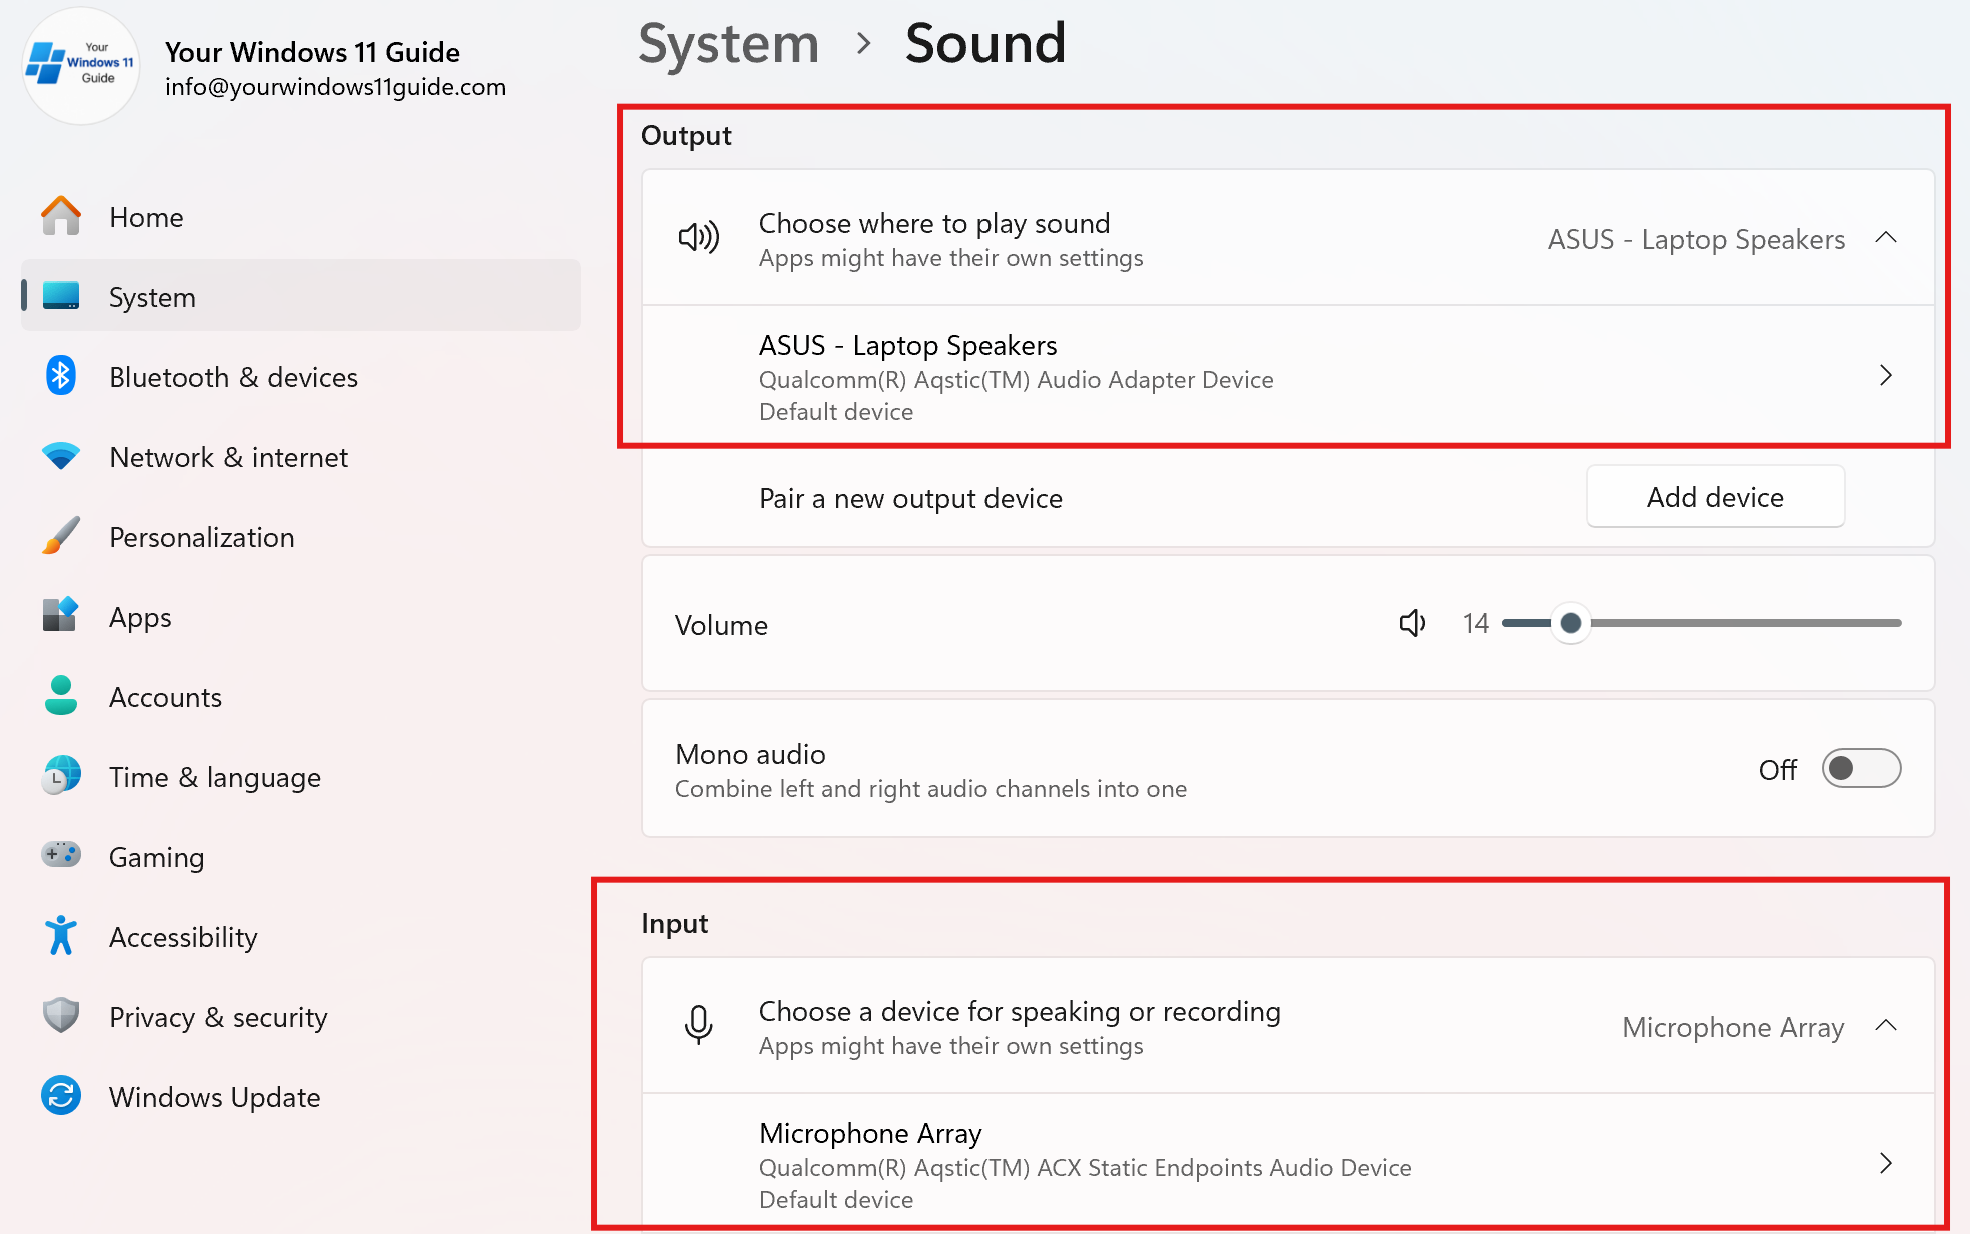
Fix Wrong Audio Output Device Selection
Before diving into settings, check the most common cause: Windows selecting the wrong audio device. This happens frequently after connecting new hardware.
- Go to Settings > System > Sound
- Under Output, select your headset
- Under Input, make sure the correct microphone is selected
- Make sure volume is not muted or set very low
Check connection (Wired vs Bluetooth)
Once the correct device is selected, the next step is to confirm the headset is properly connected.
For wired headsets, issues are usually physical:
- Make sure the cable is fully inserted into the correct port
- Try a different audio jack or USB port
- Check for loose connections or damaged cable
- If using a combo jack, ensure it supports both audio and microphone
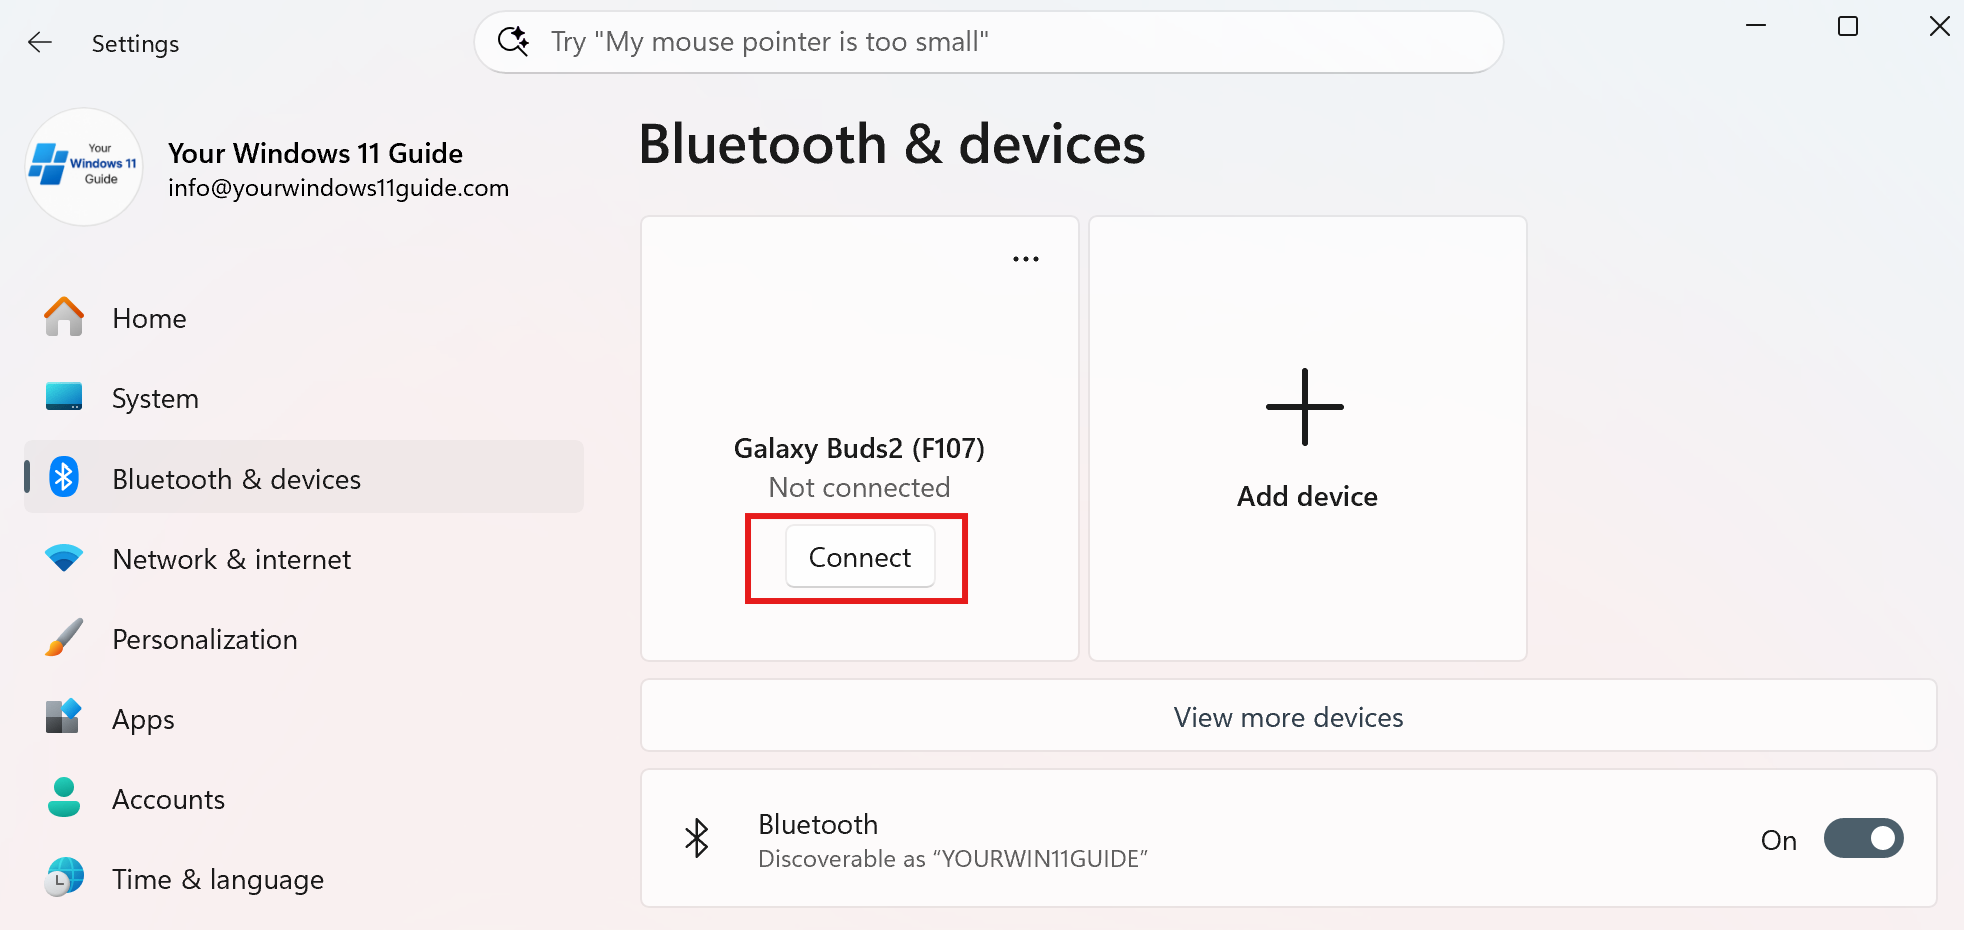
For Bluetooth headsets, connection issues are more common:
- Make sure Bluetooth is turned on: Settings > Bluetooth & devices
- Confirm the headset is connected, not just paired. If it shows as paired but not connected, click Connect
- Turn Bluetooth off and back on
- Move the headset closer to the PC to avoid interference
Fix Missing Bluetooth Button (Reinstall Bluetooth Driver)
If the Bluetooth On/Off button suddenly disappears from Windows settings, the Bluetooth driver is usually missing, corrupted, or not loading correctly.
In this case, reinstalling the Bluetooth driver often restores the option immediately.
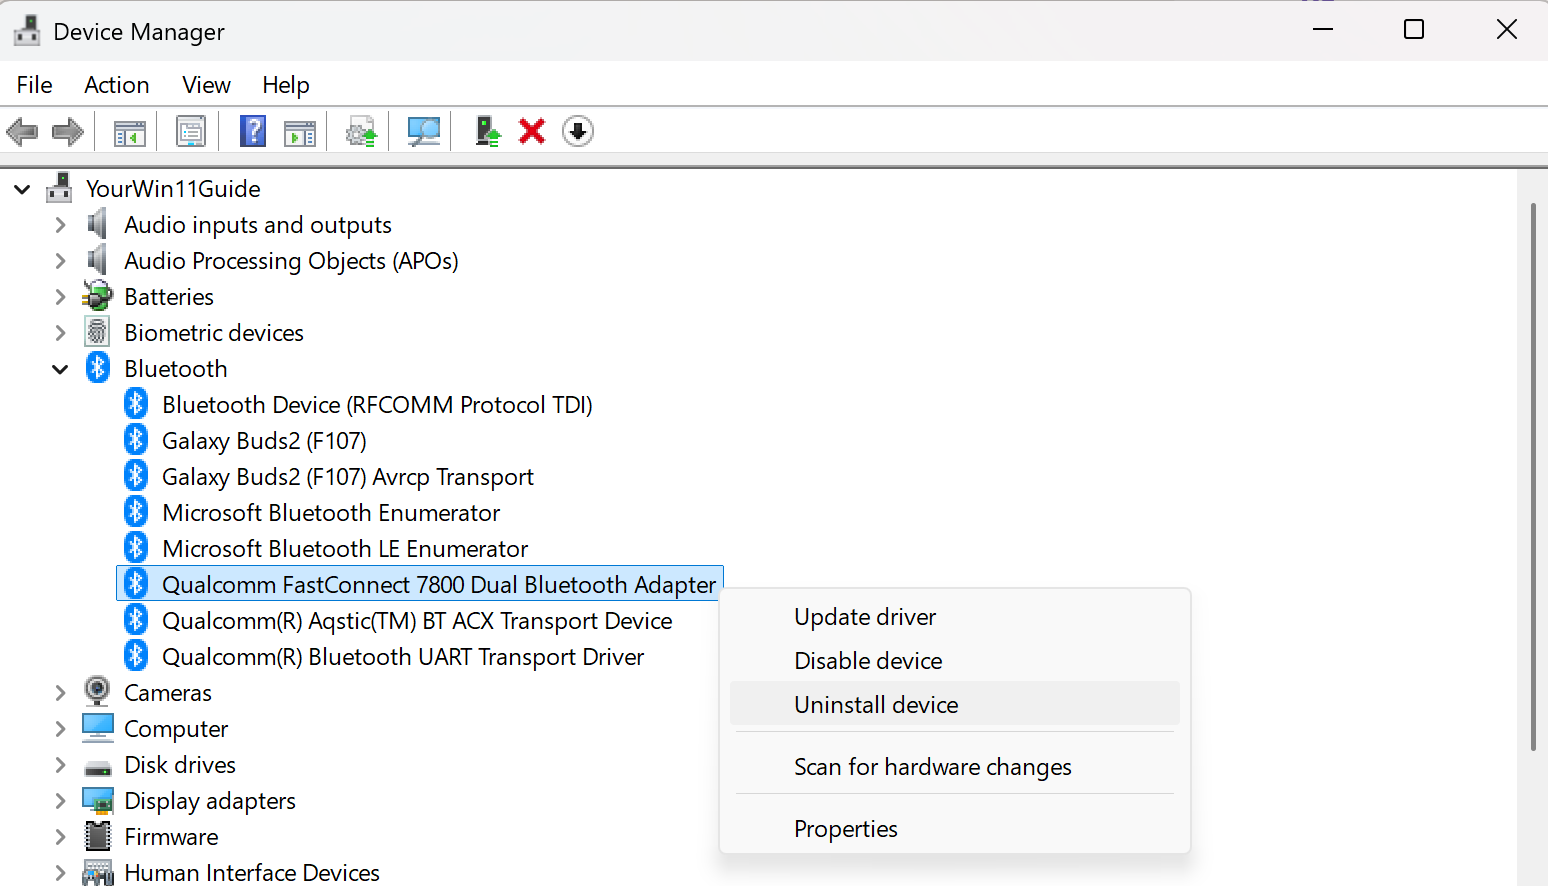
- Right-click Start > Device Manager
- Expand Bluetooth
- Right-click your Bluetooth adapter > Uninstall device
- Restart your PC
- Windows will automatically reinstall the driver
If Bluetooth does not return after restart:
- Open Device Manager again
- Click Action> Scan for hardware changes
- Or download the latest Bluetooth driver from your PC or motherboard manufacturer’s website
Reset Bluetooth Audio Connection
If your Bluetooth headset connects but doesn’t work properly, the issue is often corrupted pairing data. Reconnecting the device cleanly usually fixes it.
- Go to Settings > Bluetooth & devices
- Select the headset and click Remove device
- Put the headset back into pairing mode
- Connect it again from Settings > Bluetooth & devices
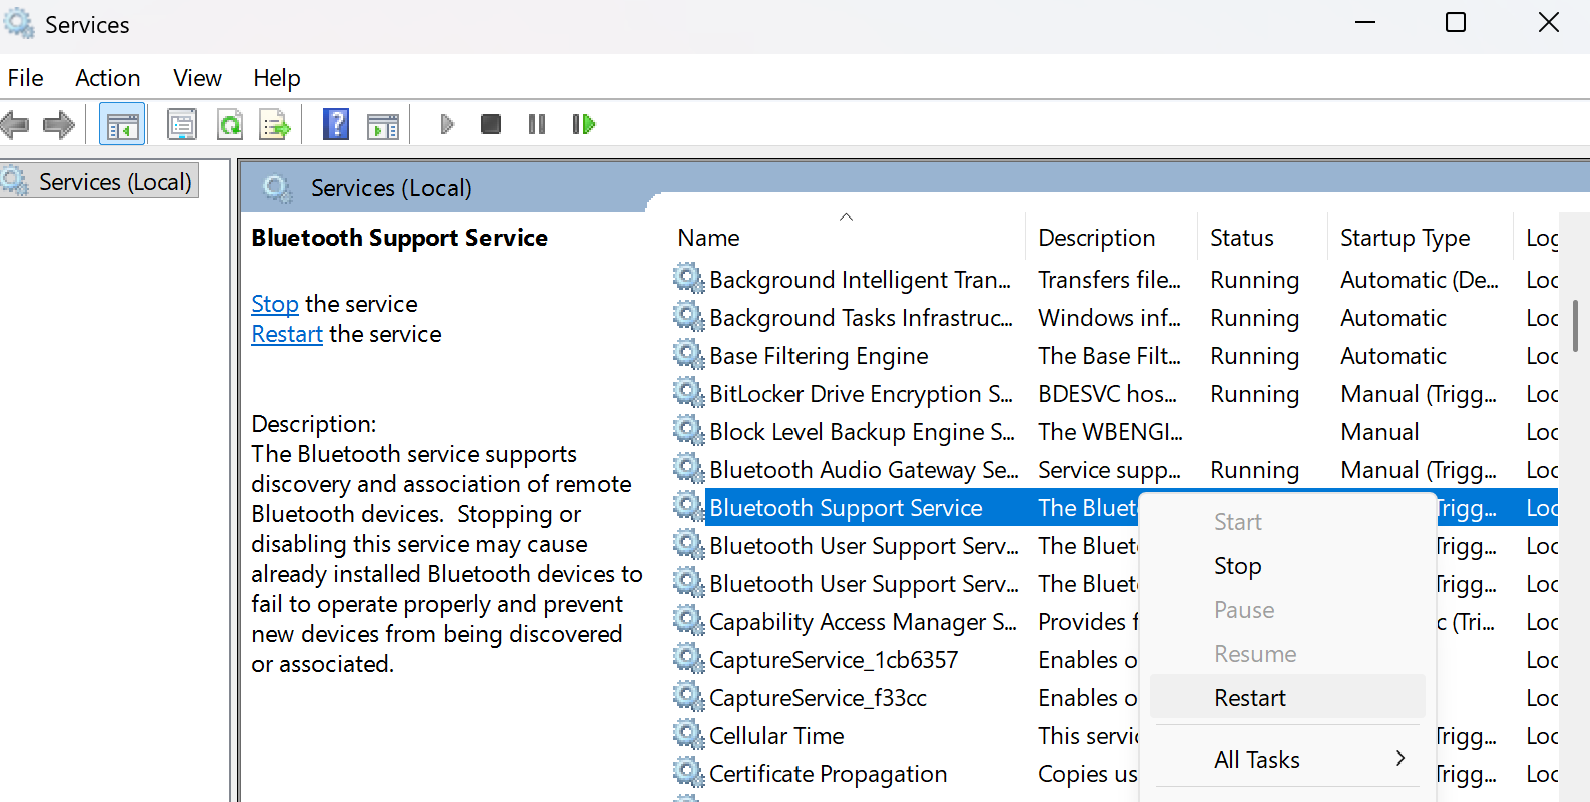
If the issue continues:
- Press WIN + R, type services.mcs
- Find Bluetooth Support Service > Restart
Run Troubleshooter and Update/Reinstall Audio Drivers
If the connection looks correct but audio still doesn’t work, Windows troubleshooting tools and drivers are the next step.
- Run the audio troubleshooter:
- Settings > System > Sound > Troubleshoot
- Open Device Manager
- Expand Sound, video and game controllers
- Right-click your audio device > Update driver
If needed, uninstall the device and restart your PC – Windows will reinstall it automatically.
Check if Audio Works on Another Device
Test the headset on another device such as a phone, laptop, or different PC. If it works there, the issue is related to Windows settings or drivers. If it does not work anywhere, the headset is likely faulty.
Pro tip
If audio suddenly stops after connecting an external monitor, Windows may have switched the output to the monitor (via HDMI or DisplayPort). Switching the output device back to your headset usually resolves this immediately.
4. Mouse and Keyboard Issues
When a mouse or keyboard stops working, it can feel like a major issue. However, if you’re using a laptop, you still have the built-in keyboard and touchpad, which makes troubleshooting much easier compared to a desktop setup.
In most cases, these problems are caused by simple things like connection issues, low battery (for wireless devices), or temporary glitches in Windows.
Both wired and wireless devices can behave differently when something goes wrong, so it’s important to quickly identify the type of connection and start with the most obvious fixes.
Basic Input Device Checks
Before checking drivers or settings, focus on the simplest causes. Many input device issues are resolved within seconds at this stage.
- Restart your PC
- For wireless devices, replace the batteries
- Turn the device off and back on (if applicable)
- Make sure there are no visible physical issues (damaged cable, stuck keys, etc.)
Check connection (Wired vs Wireless)
Connection issues are the most common cause of unresponsive input devices.
For wired devices:
- Make sure the USB cable is properly connected
- Try a different USB port
- Avoid using USB hubs temporarily (connect directly to the PC)
For wireless devices (USB receiver or Bluetooth):
- Ensure the USB receiver is plugged in securely
- Try a different USB port for the receiver
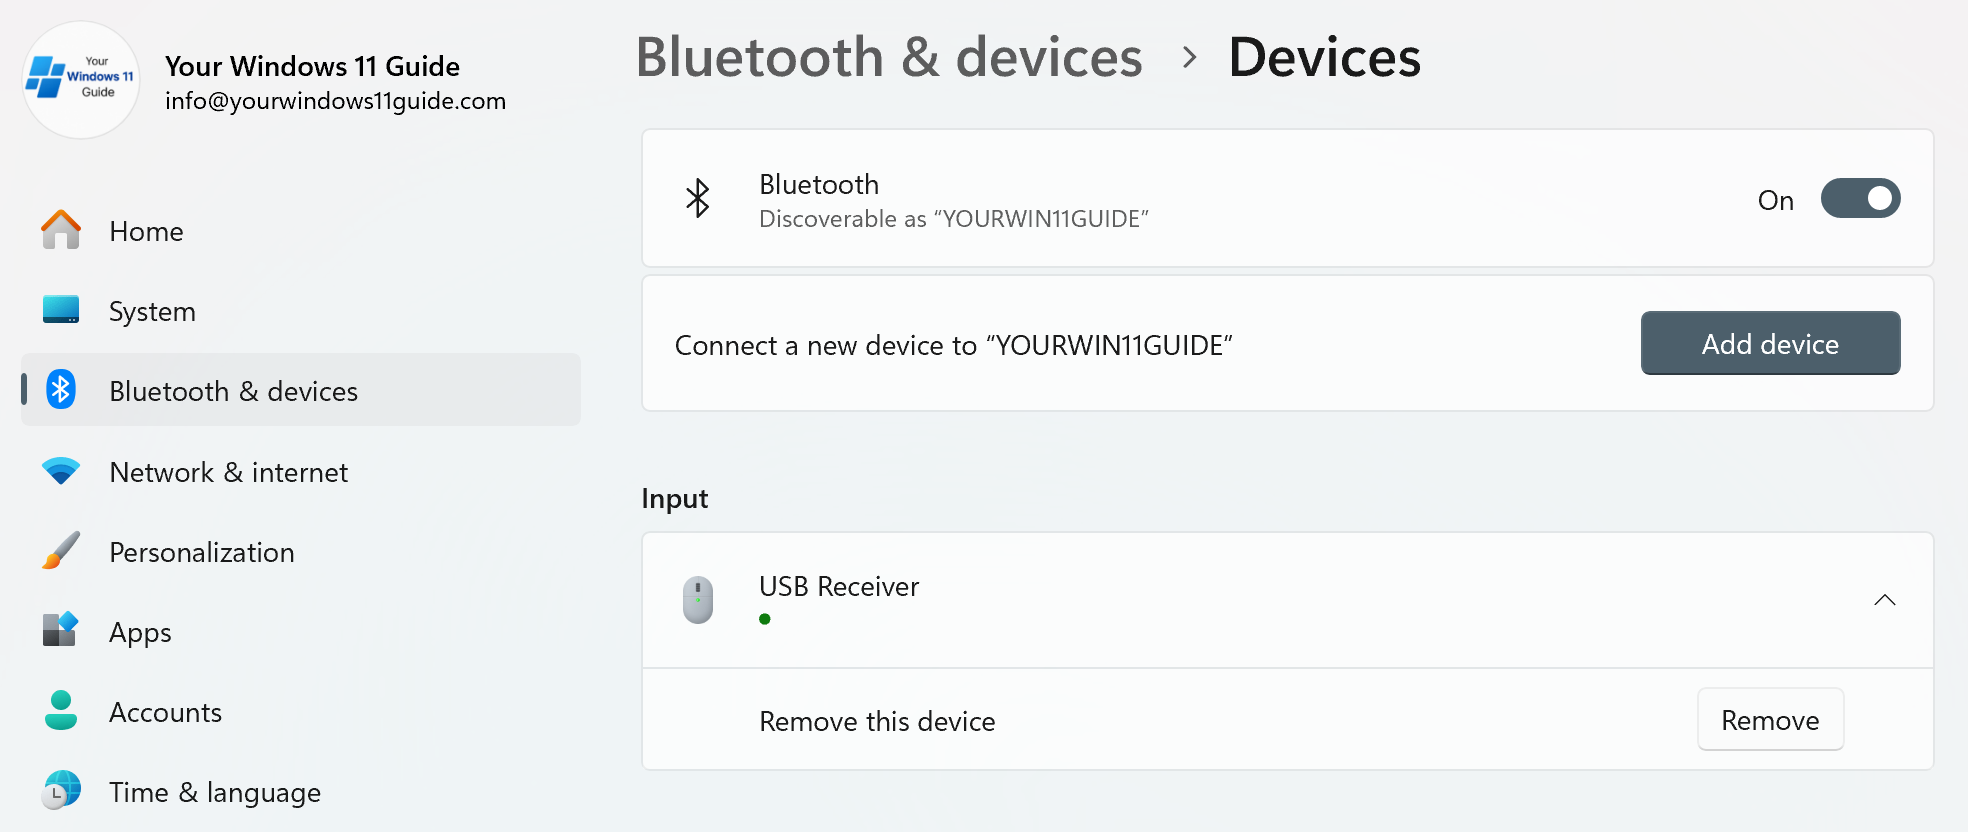
- Confirm the device is connected in Settings > Bluetooth & devices
- Try Removing it and then reconnecting
Update or Reinstall Input Device Drivers
If the device is connected but not responding correctly, Windows may not be communicating with it properly.
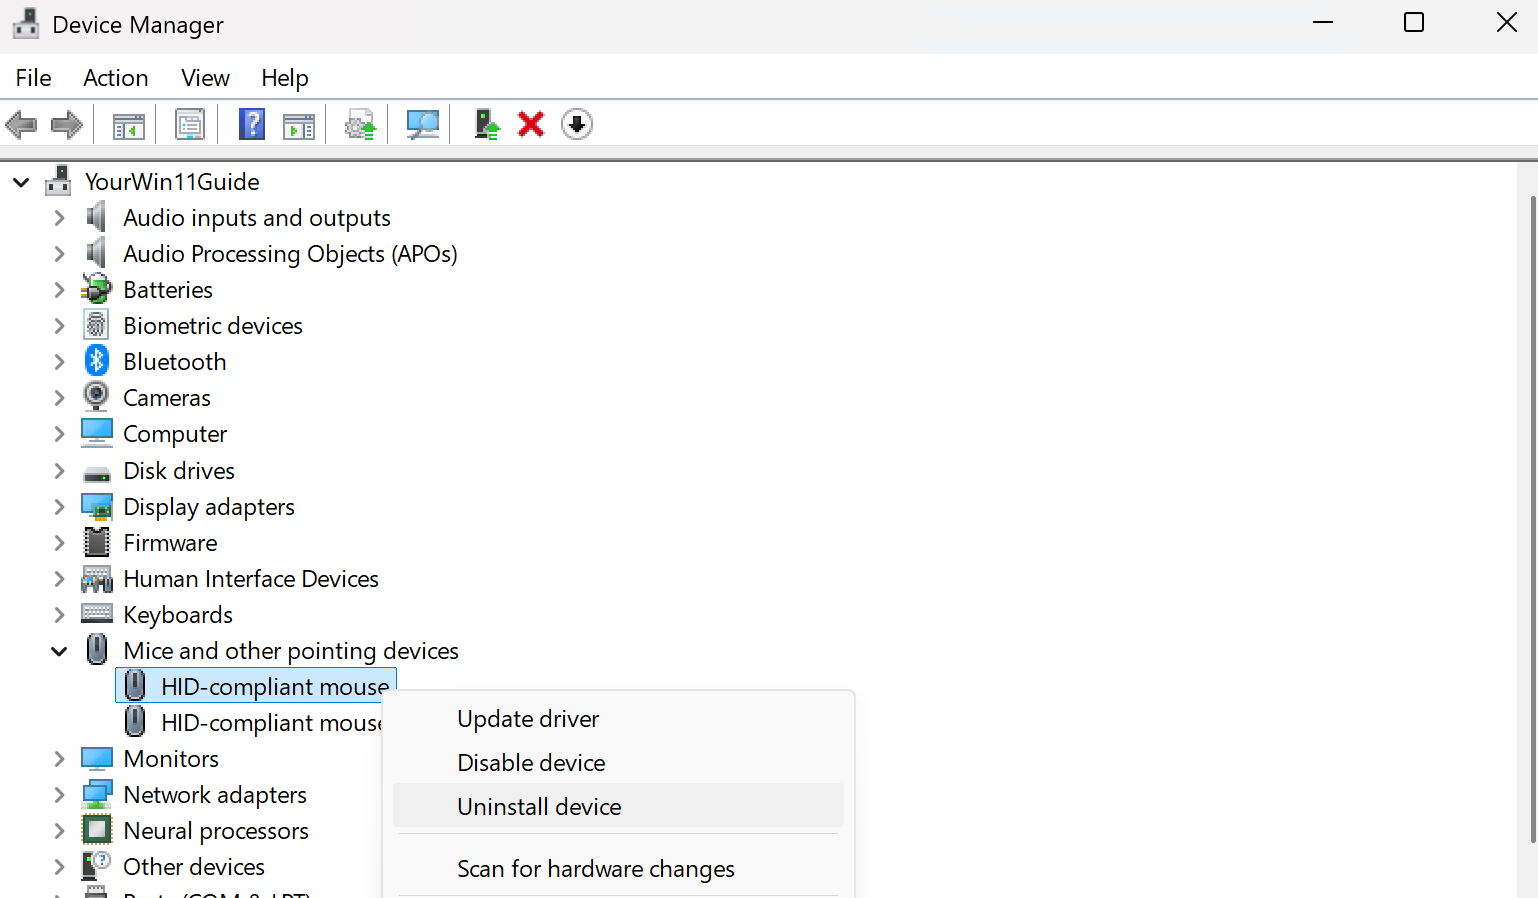
- Open Device Manager
- Expand Mice and other pointing devices or Keyboards
- Right-click your device > Update driver
If the device behaves incorrectly (lag, freezing):
- Right-click the device > Uninstall device
- Restart your PC to reinstall it automatically
Check if the Device Works on Another PC
If the issue continues, it’s important to determine if it’s a system problem or hardware failure.
- Test the mouse or keyboard on another computer
- If it doesn’t work there, the device is likely faulty
- If it works normally, the issue is within Windows
Real-world tip
If you’re using multiple USB devices (like a wireless mouse, keyboard, headset, or docking station), make sure the USB receiver is plugged into the correct port and not shared through a hub that may limit stability. Some devices work better when connected directly to the PC instead of through a dock or USB splitter.
5. External Monitor Issues
External monitor issues are very common in Windows 11, especially when using laptops, docking stations, or multiple displays. A monitor may be physically connected but not detected, show a blank screen, or display incorrectly with the wrong resolution or refresh rate.
In most cases, the issue isn’t the monitor itself. It’s usually related to the connection, input source, or display settings in Windows. Starting with simple checks will often resolve the problem quickly.
Basic Monitor Connection Checks
Before adjusting settings, confirm that the monitor and connection are working properly.
- Make sure the monitor is powered on
- Check that the cable is securely connected (HDMI, DisplayPort, USB-C)
- Restart your PC and the monitor
If the monitor is connected through a docking station, try disconnecting it and connecting it directly to your laptop. This helps confirm if the issue is related to the dock rather than the monitor, cable, or Windows settings.
Check Input Source and Detection
A very common issue is the monitor being set to the wrong input source or Windows not detecting it automatically.
- Use the monitor’s built-in menu to select the correct input (HDMI, DisplayPort, etc.)
- In Windows:
- Go to Settings > System > Display
- Scroll down to the Multiple displays section
- Click Detect if the monitor is not showing
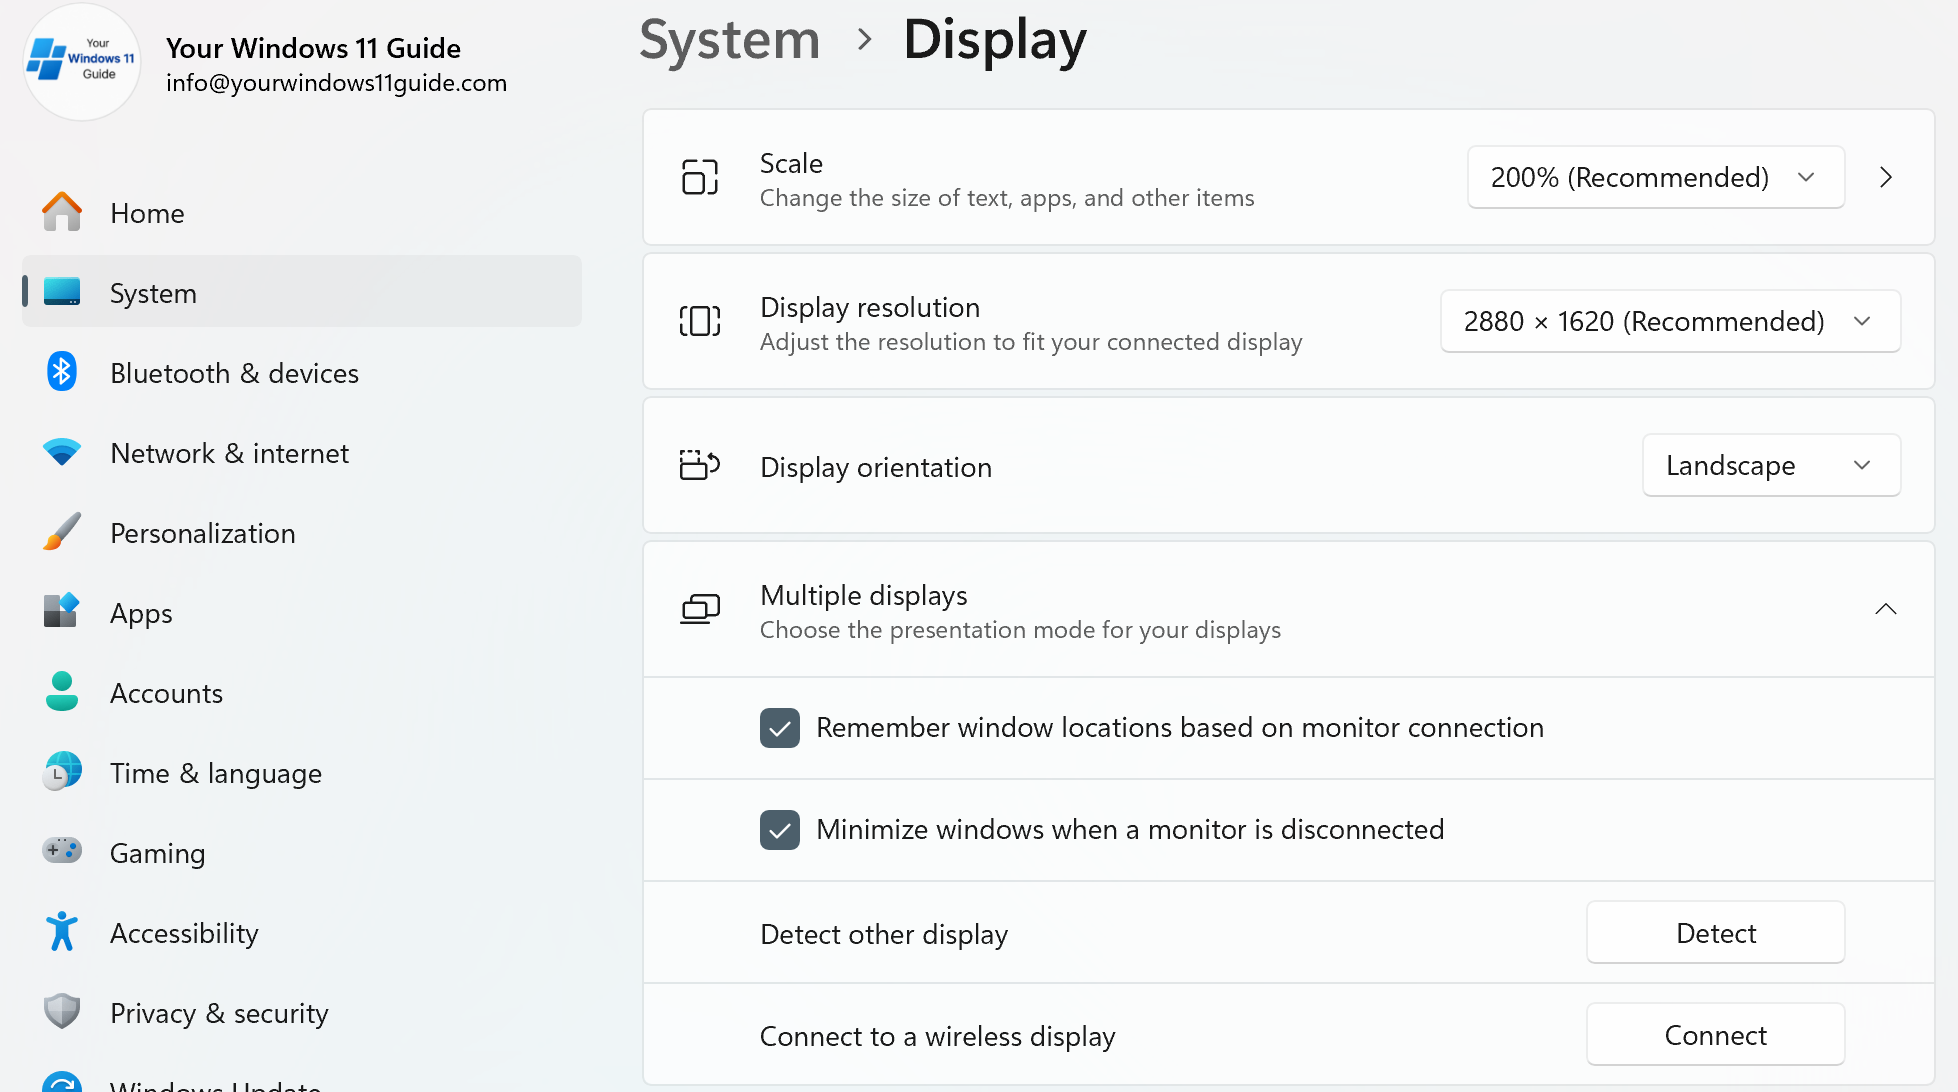
Adjust Resolution, Scaling & Refresh Rate
If the monitor is detected but doesn’t look right, the issue is usually related to resolution or display configuration.
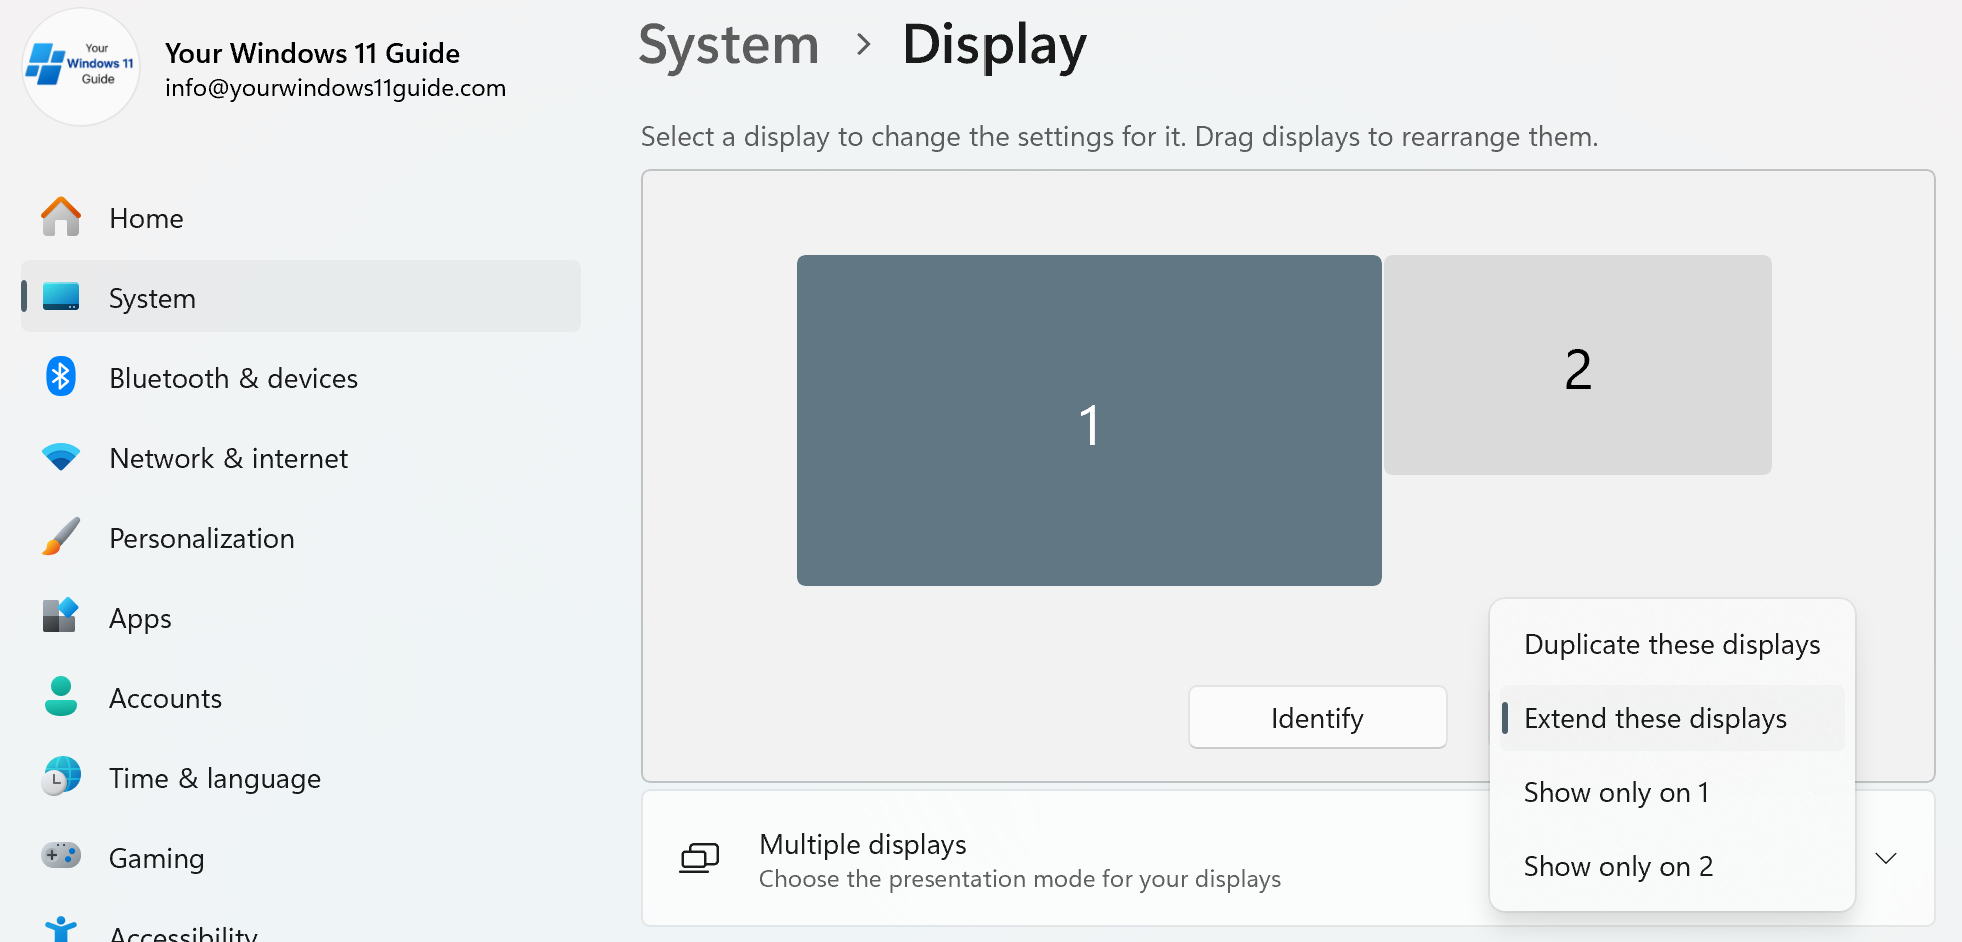
- In Settings > System > Display:
- Make sure the correct monitor is selected
- Set the desired display mode (Duplicate, Extend, Show only 1 or 2)
- Scroll down to adjust resolution and scaling
- Open Advanced display settings to check refresh rate
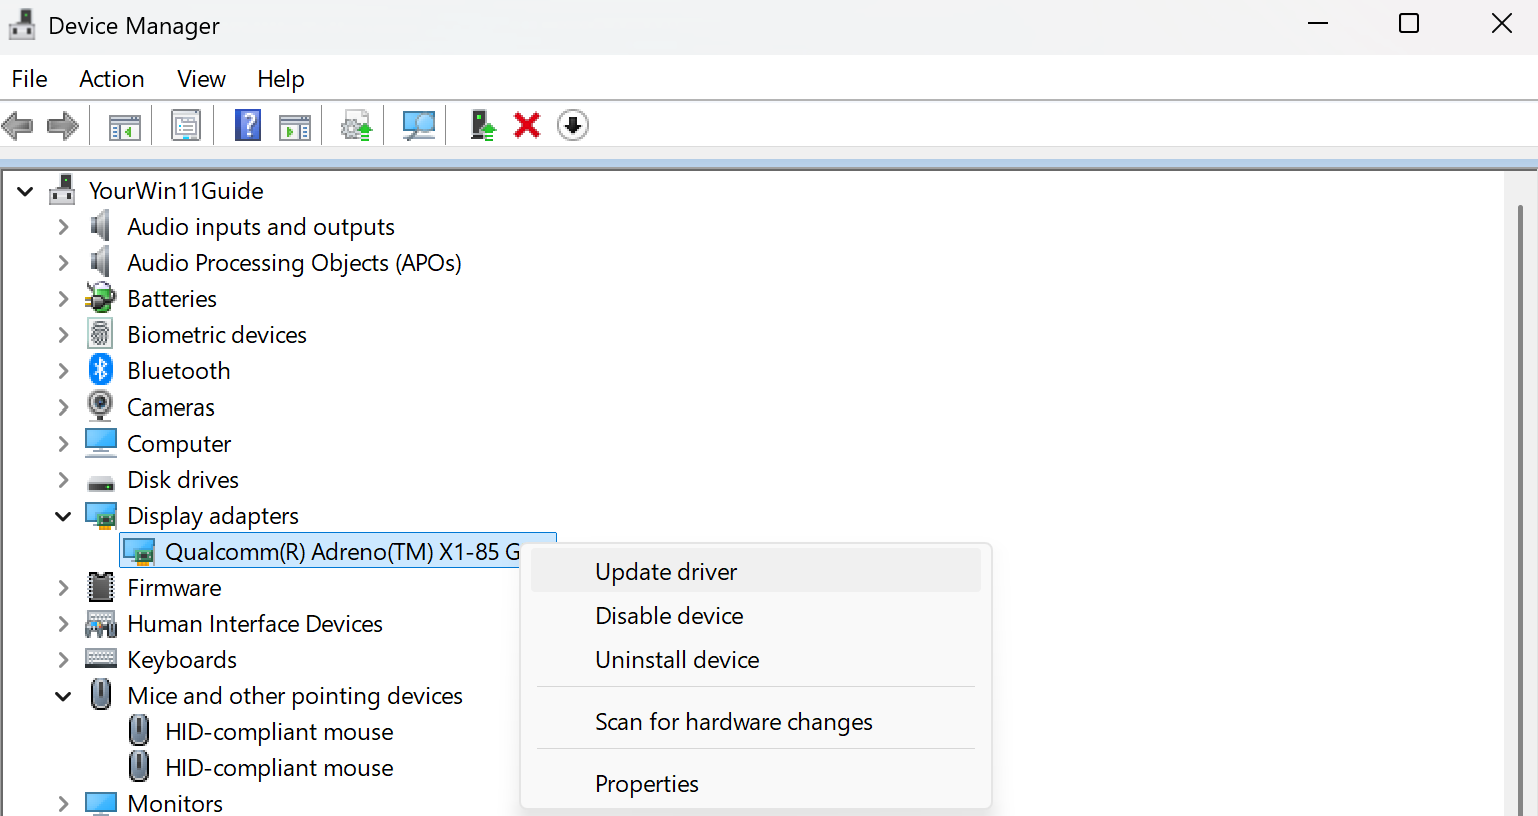
Update Graphics Drivers
If Windows still doesn’t detect the monitor, the issue may be related to drivers or the connection hardware.
- Open Device Manager
- Expand Display adapters
- Right-click your graphics card > Update driver
If needed:
- Try a different cable
- Test with another monitor
- Try a different port on your PC
What often happens
If your monitor is connected but shows no signal, it’s often a cable or input issue rather than a Windows problem. Also, some USB-C ports only support data transfer, not video output, which can prevent external displays from working.
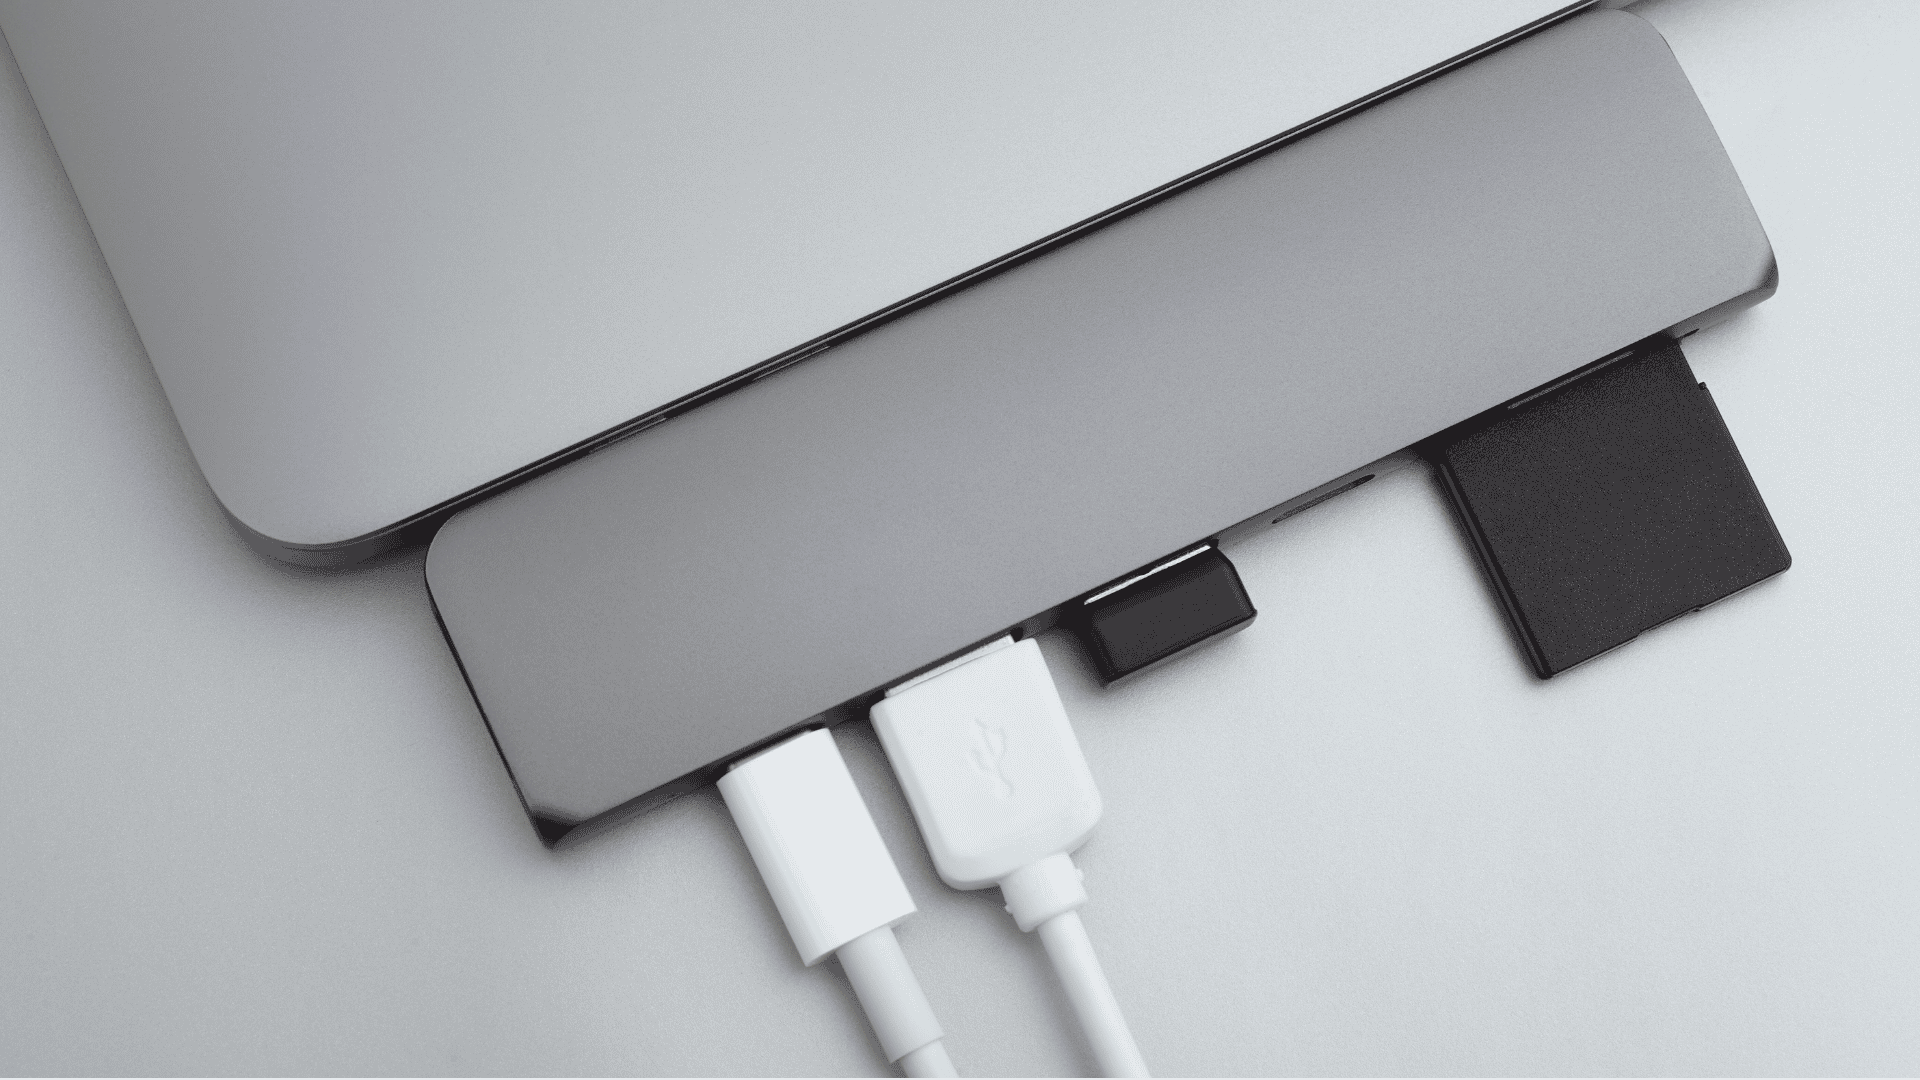
6. Docking Station Issues
Docking stations can be one of the more confusing peripherals because they handle multiple things at once — power, USB devices, network, and external displays. Problems often appear after reconnecting the dock, switching laptops, or installing system updates. Because so many components are involved, the best approach is to start simple and isolate the issue step by step.
Basic Docking Station Connection Checks
Before checking drivers or settings, make sure the docking station is properly connected and powered.
- Disconnect and reconnect the docking station
- Restart your PC
- Confirm the power adapter is plugged in and working
- Check that the USB-C or Thunderbolt cable is fully inserted
Fix Connected Devices Not Working
Since docking stations connect multiple peripherals, it’s important to identify if the issue affects everything or just one device.
- Check if USB devices (mouse, keyboard) are working
- Check if external monitor is detected
- Test individual ports on the dock
If only one device isn’t working, the issue is likely isolated to that connection rather than the dock itself.
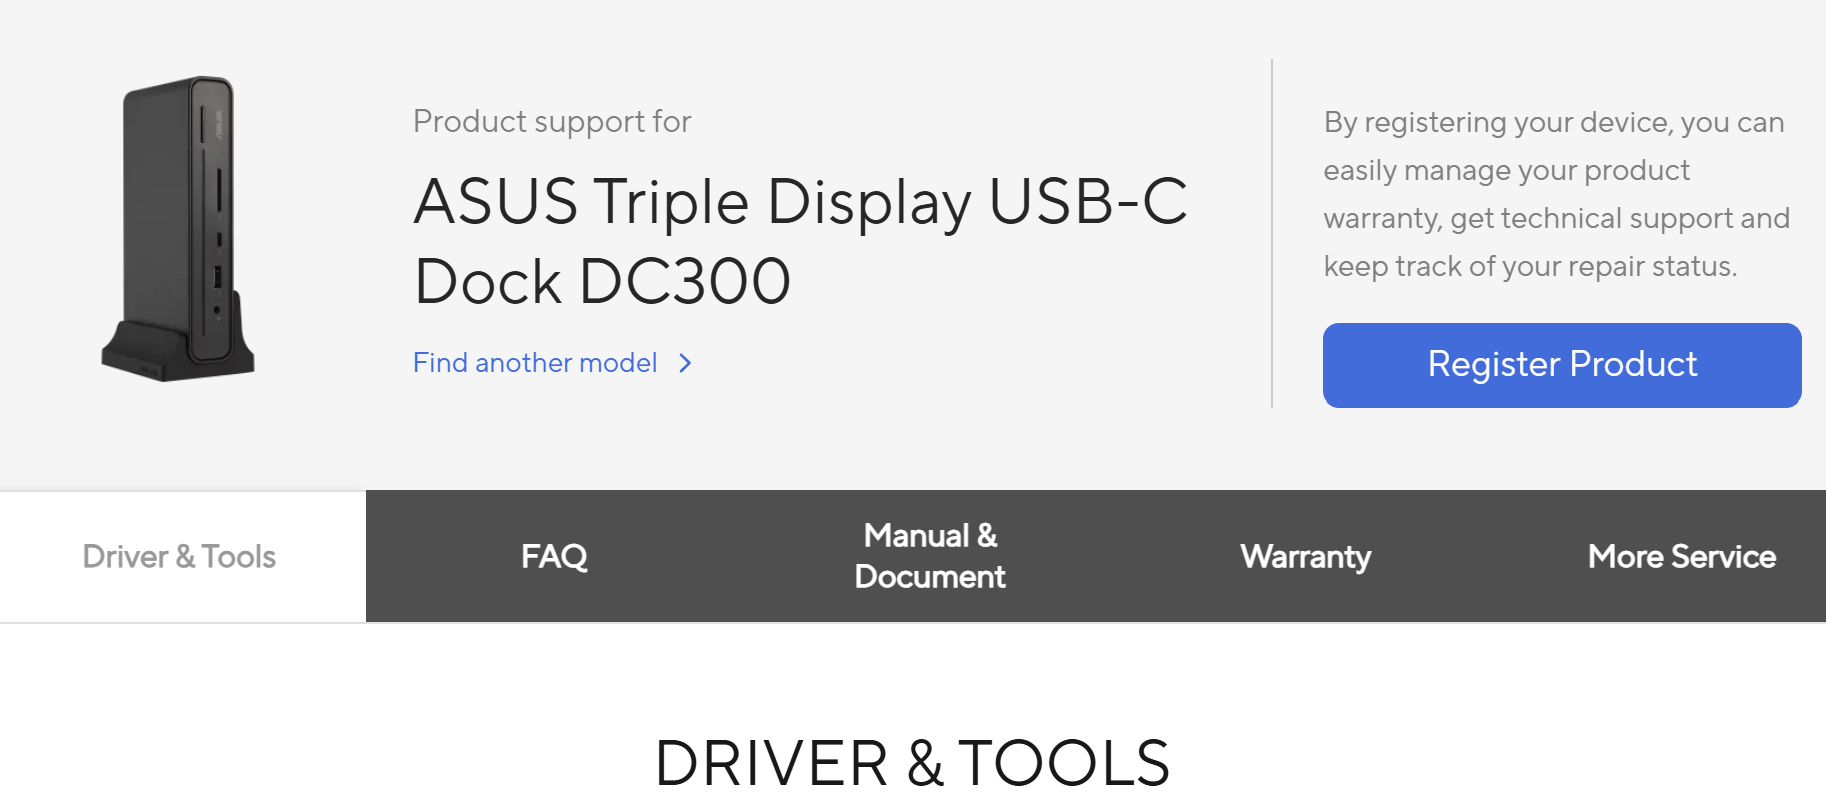
Update Docking Station Drivers & Firmware
Docking stations often require specific drivers or firmware updates from the manufacturer, especially for display and power features.
- Visit the manufacturer’s website
- Download and install the latest drivers or firmware
- Restart your PC after installation
Confirm Compatibility
If the docking station still doesn’t work properly, the issue may be related to compatibility or hardware limitations.
- Test the dock with another laptop or PC
- Try a different cable if possible
- Make sure your laptop’s port supports video output (USB-C vs Thunderbolt)
Worth checking
If external monitors connected through the docking station are not working, the issue is often related to graphics drivers or port limitations rather than the dock itself. Checking those areas can save time instead of repeatedly reconnecting the dock.
7. Webcam Issues
Webcam issues in Windows 11 are often less about hardware and more about permissions or app conflicts. A camera might be fully functional, but Windows or a specific app may not have access to it, making it appear like it’s not working at all.
This is especially common after updates or when switching between apps like Teams, Zoom, or the built-in Camera app. Starting with basic checks usually resolves the issue quickly.
Basic Webcam Connection Checks
Before checking settings, make sure the webcam is properly connected and not blocked.
- Confirm the webcam is plugged in securely (for external cameras)
- Make sure there is no physical cover blocking the lens
- Restart your PC
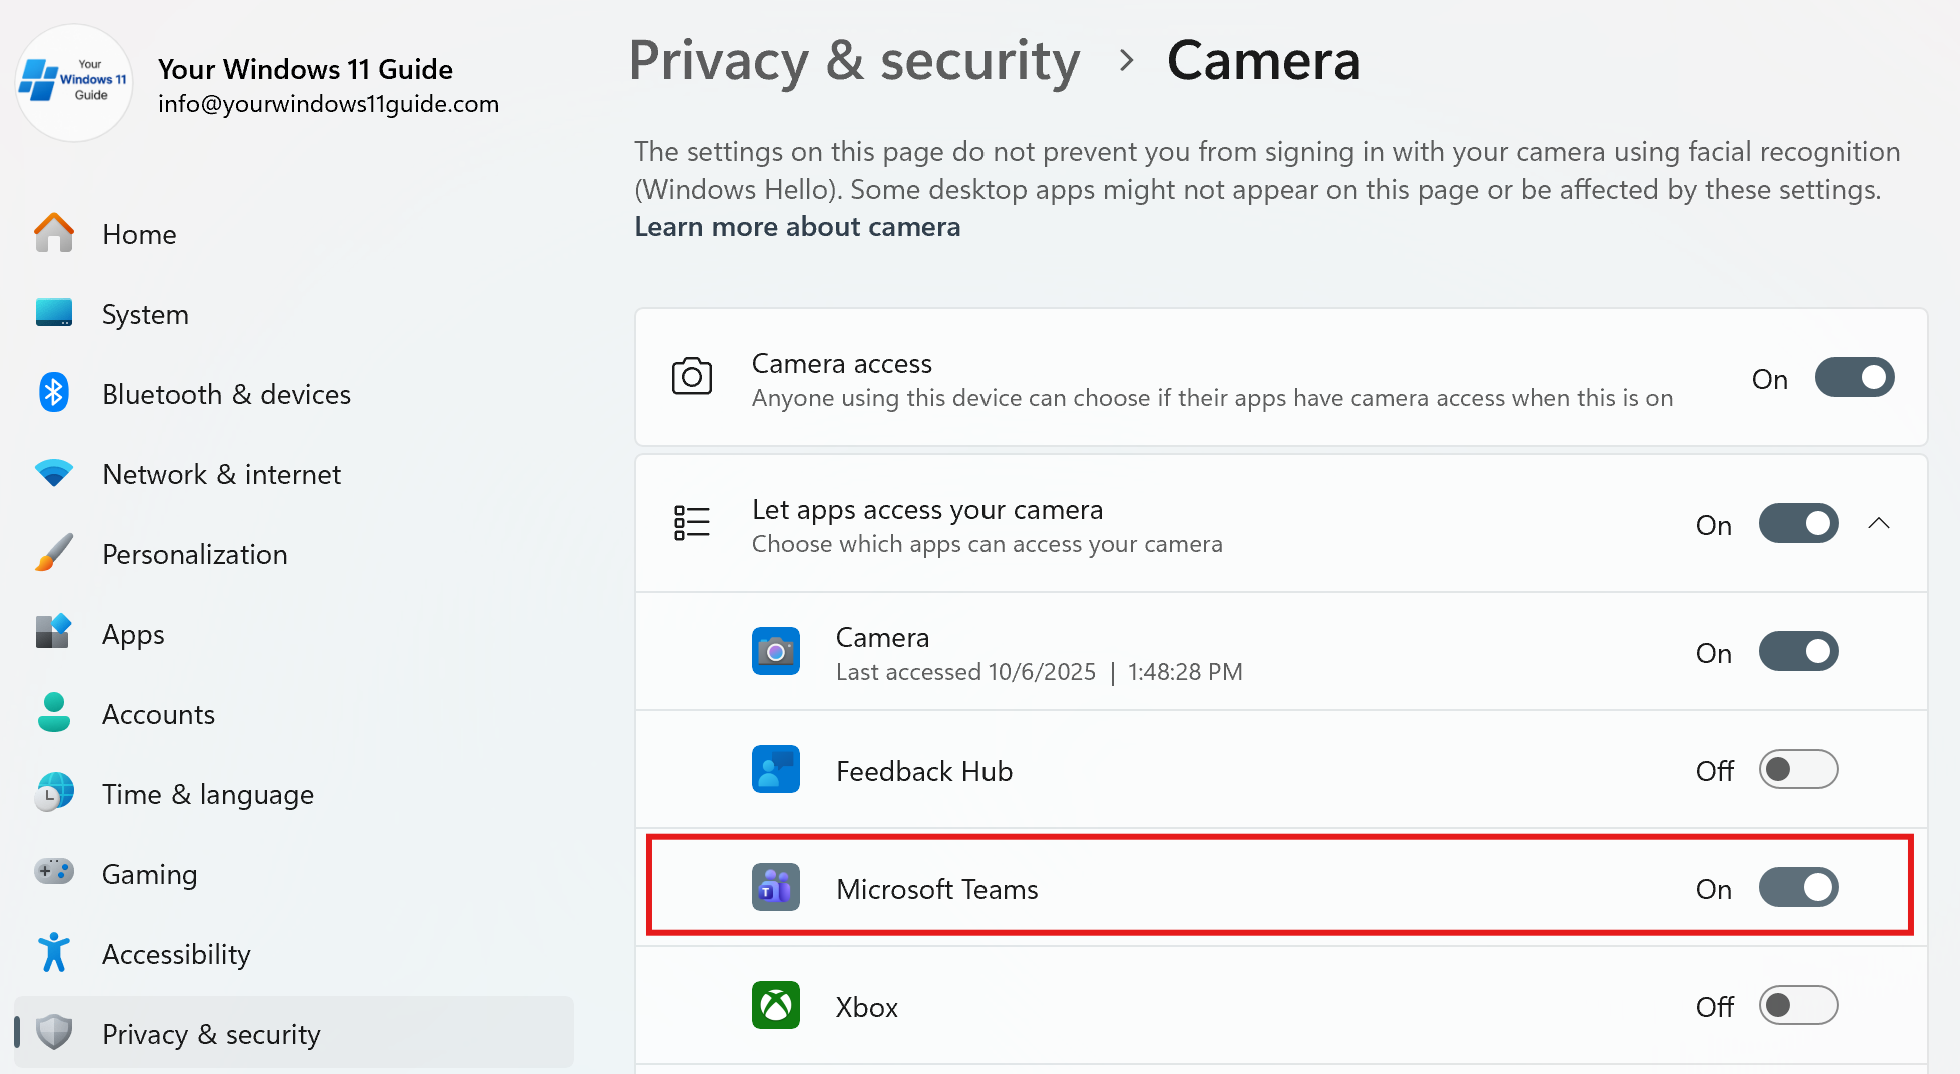
Fix Camera Permissions in Windows 11
One of the most common causes is Windows blocking access to the camera. Even if the webcam works, apps won’t be able to use it without permission.
- Go to Settings > Privacy & security > Camera
- Make sure Camera access is turned on
- Enable access for the specific app you’re using
Test Webcam in Windows Camera App & Other Apps
If the webcam doesn’t work in one app, it may not be a system issue.
- Open the Camera app in Windows
- Or test in another app like Teams or Zoom
If it works elsewhere, the issue is likely with the original app’s settings.
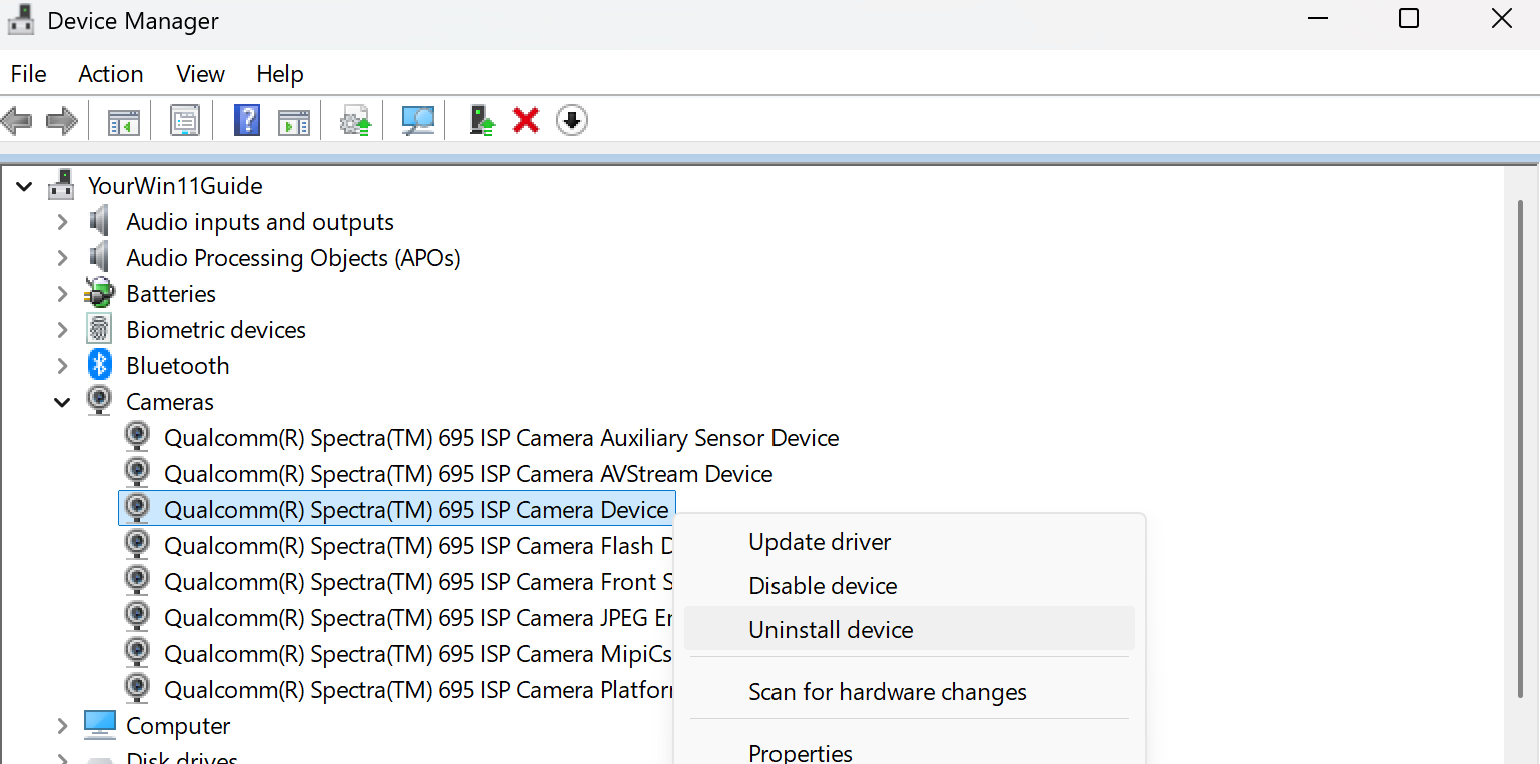
Update or Reinstall Webcam Drivers
If the webcam is not detected at all, the issue is usually driver-related.
- Open Device Manager
- Expand Cameras
- Right-click your main camera device > Update driver > select Search automatically for drivers
If updating doesn’t help, reinstall the camera drivers:
- Right-click your main camera device (or all camera entries if needed) > Uninstall device
- Restart your PC — Windows will automatically reinstall the drivers
Quick insight
If multiple apps are open, only one can use the webcam at a time. Closing other apps that might be using the camera often resolves the issue immediately.
Wrapping it up
Most peripheral issues in Windows 11 come down to a few common causes: connection problems, outdated drivers, or temporary system glitches. Once you understand that, troubleshooting becomes much more predictable and far less frustrating.
From real-world experience, the majority of issues can be resolved by taking a few simple actions — restarting both the PC and the device, checking cables and wireless connections, keeping drivers and Windows up to date, and reconnecting or reinstalling devices when necessary. These steps may seem basic, but they consistently solve the most common problems without requiring advanced troubleshooting.
If you want to go further and improve overall system stability and performance, you can also explore related guides like Troubleshooting Common Windows 11 Problems and Speed Up Windows 11 Startup, which cover broader system-level issues and optimizations.